How To Decorate Cake Pops With Icing? (In Short!)
by Terry R.
Another post after a long break on Sweet Revelations. Cheer up!
Cupcakes are good but when things are on sticks, they are always better. That’s why cake pops are more appealing and adorable to people.
Most importantly, these are easy to make and serve. Everybody especially kids just love these cute desserts.
Whether it’s someone’s birthday or bridal or baby shower, cake pops are one thing that is common. It not only serves as a food item but also a part of the decoration. Therefore, decorating them with icing, or toppings, is indeed a necessity.
Let’s learn how to make your cake pops more mouthwatering.
Contents
Making Cake Pops Brief Discussion
The decoration is the last step to be performed in creating cake pops.
Step 1: Baking
First, you have to do the baking job. You can use your favorite cake recipe. It may be the trendy chocolate or vanilla. Or you can go for something different like red velvet or strawberry or cookies and cream.
Step 2: Crumbling
As it cools, now crumble it with your fingers.
Step 3: Frosting
Now it’s time for frosting. Again, it depends on your choice which recipe you want to follow.
It may be the peanut butter or cream cheese frosting or buttercream. But it’s not just adding your favorite flavor but also a matter of combination.
For example, Peanut butter will go well with chocolate cake. To give your cake a pretty rose color, choose vanilla frosting with your red velvet recipe.
Again, carrot cake and cream cheese frosting have been a great combination so far. So choose the flavors wisely.
It’s also important to mix the right amount of frosting. Use the amount just to moisture the crumbles needed for rolling them into balls. An excess amount, otherwise, will give the pulp an unpleasant texture.
Step 4: Rolling
Now Using ice cream scoop and also your hand, make round balls. Then refrigerate them for 10-20 minutes.
Step 5: Melting Candy
While the balls are in the refrigerator, melt the chocolate or candy, to use for coating the pops. You can Use the microwave or fondue pot. (Read our Fondue melting pot buying guide.) But don’t forget to stir.
Step 6: Dipping
Dip the stick first and then glue the pops with the stick by inserting them into the sticks. Now dip them into the melted chocolate so that the balls are entirely covered. Then drip off the excess fluid and smoothen the surface with your finger.
Step 7: Icing and Decoration
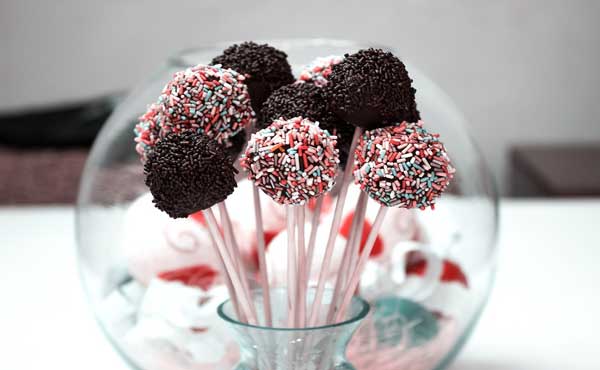
If you want to decorate them with icing, it’s time to do that now. You can use-
- Sprinkles
- Chocolate chips
- Cookie Crumbles
- Crushed nuts
- Coconut
Or whatever you can imagine is possible as a topping. Spread them all over the coated cake pops so that they are uniformly distributed.
Now insert them in the Styrofoam block and allow them to dry. You can also refrigerate them for faster setting or simply leave them in a cool place.
Again, you can go for homemade icing or buy canned icing. For easy application, make a piping bag.
How to make a piping bag?
- First, enroll a baking paper. Then fold one corner of it such that it makes a triangle shape.
- Then mark the crease and cut the paper into a square shape using a scissor.
- Now cut along the crease again to separate them into two triangles.
- Now Mark the center of the longest side as the nozzle will sit here.
- Hold one corner and then fold the other corner up and around the apex.
- Now holding on to this arrangement, bring the other side around and secure it by folding the top over.
- Staple it to secure it in place.
- Finally, Snip off the end of the bag and drop a nozzle.
Your piping bag is ready.
Now Fill the bag with icing and fold the top over and staple it.
After dipping the balls and drying them, the coating outside will get hardened. That means the coating is perfectly set now.
Now hold the piping bag filled with icing within your fist and squeeze it. Design the surface of the hardened cake pops. Draw whatever your mind wants. It’s time to show your creativity.
After you’re done icing, allow it to set for some moment.
Well done! You have just created an art.
Final Verdict
You can bring a lot of variety in making cake pops. Variety not just only in flavors and colors but also in sizes and shapes. Blueberry muffin, Butterfinger, apple cinnamon, there are a lot of other types.
Again, you not necessarily have to make round shape cake pops. You can also try heart shape, star or Micky mouse.
Cake pops alone can add to the party decoration to a great extent.

About Terry R.
Hello everyone, Nice to meet you!I'm Terry. The man behind the sweet revelations blog. I'm a father of two energetic kids. I grew up in New York. I love to read books. I like to spend most of the time with my family and friends. I used to learn new things and wish to share my knowledge with others.
Thoughts on "How To Decorate Cake Pops With Icing? (In Short!)"
 |
 |
 |
 |
Kitchen - Outdoor